Casting Wadcutters to Order by Aaron Bittner
Lots of revolver shooters love the cast full wadcutter.
Fortunately, if you're a bullet caster already, you probably already have the tools at hand to make all the cast wadcutters you need. All it takes is an appropriate bullet mold (of nearly any profile) in the caliber of your choice, and a supply of gas checks for that caliber. It doesn’t matter if the mold isn't for a gas-checked bullet. No, really...I haven't lost it. Bear with me for a minute, and I'll show you a trick that Paco Kelly told me about.
Casting the Full Wadcutter
Start with the lead pot hot and the mold preheated, of course. Nearly any mold for a conventional bullet profile will do, provided that it's a base-pour design. For this example I used a single-cavity RCBS .45-500-FN mold, which throws a classic 500-grain gas-checked bullet for .45-70.
Lots of revolver shooters love the cast full wadcutter.
- It makes for an easy-scoring target.
- It's inexpensive, whether you cast it or buy it.
- It can be quite accurate.
Fortunately, if you're a bullet caster already, you probably already have the tools at hand to make all the cast wadcutters you need. All it takes is an appropriate bullet mold (of nearly any profile) in the caliber of your choice, and a supply of gas checks for that caliber. It doesn’t matter if the mold isn't for a gas-checked bullet. No, really...I haven't lost it. Bear with me for a minute, and I'll show you a trick that Paco Kelly told me about.
Casting the Full Wadcutter
Start with the lead pot hot and the mold preheated, of course. Nearly any mold for a conventional bullet profile will do, provided that it's a base-pour design. For this example I used a single-cavity RCBS .45-500-FN mold, which throws a classic 500-grain gas-checked bullet for .45-70.
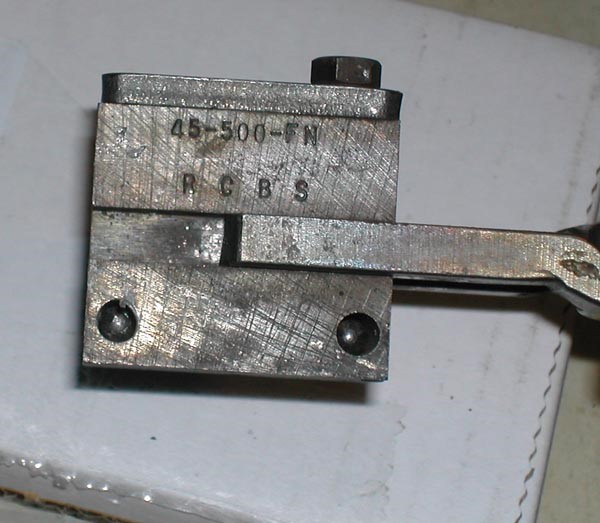
Figure 1: The RCBS 45-500-FN uses a large single-cavity block. It is both excellent and easy to photograph.
Opening the mold, you'll see that there are areas in the mold cavity that correspond to driving bands on the bullet.
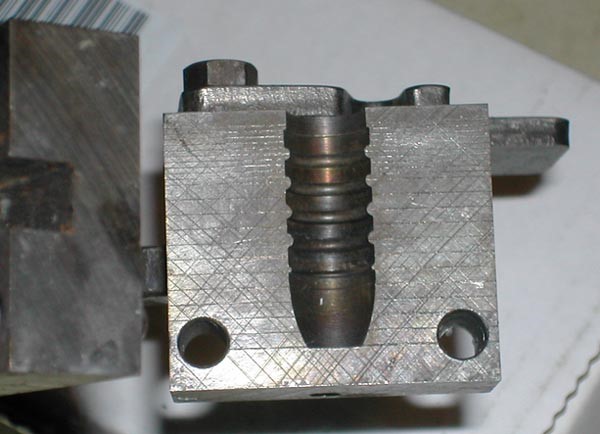
Figure 2: The RCBS 500-grainer features five driving bands.
The next step requires a bit of dexterity. Open the mold and insert a gas check into a spot in the mold cavity that corresponds to a driving band. The gas check should be inverted in the mold, meaning that the turned-up rim should point toward the base of the bullet; the photo shows what this looks like. Dexterity is required so that you don't burn your fingers in the process. A good pair of work gloves helps, but makes it hard to pick up the gas checks. I have used forceps to do this, with good results. When the gas check is in place, close the mold around it.
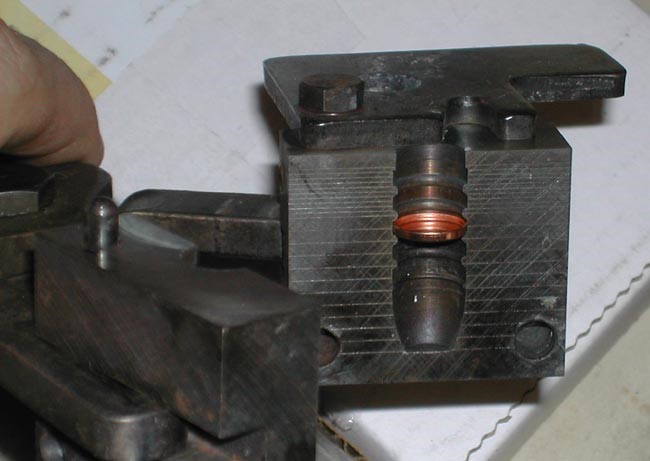
Figure 3: The gas check should fit snugly upside-down in the mold.
The next thing to do is to pour the mold. As the alloy fills the mold, the gas check keeps the alloy from flowing down into the lower part of the cavity. The hot alloy also anneals the gas check in the process. If everything goes as planned, when you've knocked off the sprue and opened the mold the result looks something like Figure 4.
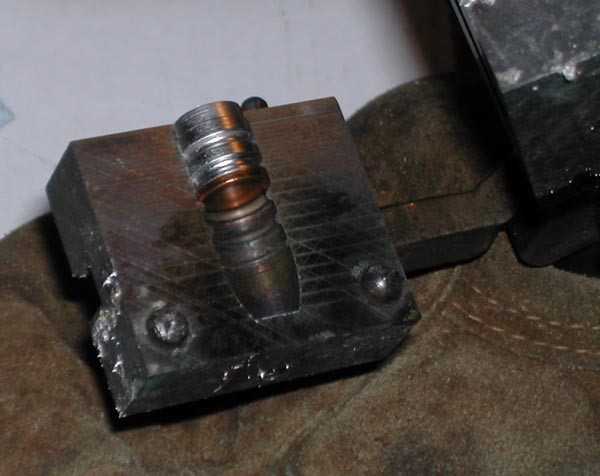
Figure 4: This .45 full wadcutter drops from the mold at about 200 grains.
The result is a nose-poured, gas-checked wadcutter in which the part that would have been the gas-check shank in the original profile is now an abbreviated nose section, and the gas check is cast into place and annealed. You may find that after casting, the gas check may be free to rotate on the bullet or even pop off with a little persuasion. Don't be concerned by this. The gas check will be crimped firmly into place during sizing.
A bullet mold in a profile with several driving bands proves its worth here, as it allows you to cast wadcutters in various lengths and weights.
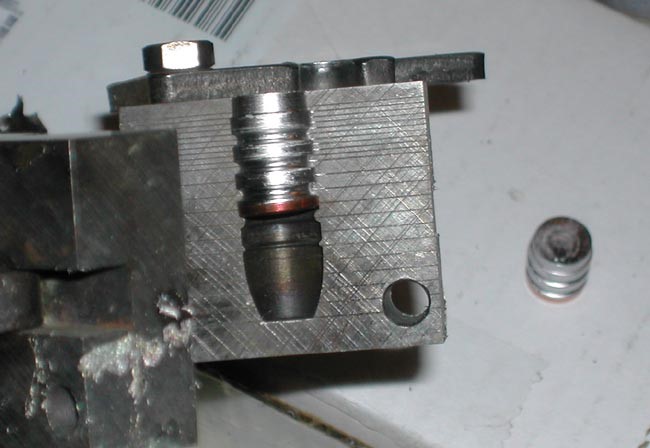
Figure 5: Putting the gas check in different driving band slots lets you cast wadcutters in various weights.